Wednesday, October 16, 2013

Finally - How to Install a Tire Liner and Stop Flats - by RhinoDillos' Bike Girl

You Can Install RhinoDillos Yourself, Even if Bike Dealer Installation Is Preferred


Bike Girl shows you the step-by-step method for getting the best tire liner available today into your tire and fitting nicely between the tire and the inner tube.

We'd love to hear from you about this video.  Does it look easy?  How did Bike Girl do?  Have you tried to install a RhinoDillos tire liner?


Friday, August 2, 2013

How to Prevent Flat Tires on Mountain Bikes and Trail Bikes

Are you Living Under a Rock?

Stop Flats and Save Time, Money, Irritation, Loneliness, and Embarrassment 


It is waaaay past time for the excuse making to end!  Wasting precious daylight on fixing a flat is just not acceptable any more.  Technology has solved many troublesome aspects of life in this world.  Flat tires on mountain bikes is one of them.

You can claim that you've been under a rock for the last 30 years, or that you are the current remake of Rip Van Winkle, but I'm not sure such lame offerings are gonna fly in 2013.  Tire liners first came to market in 1980.  Were you even born in 1980.  Like, this was even before smart phones.  Oh.  It was before the internet (1994).  Hmmm.  It was before the Apple II C (1982) that changed everything.  In fact, this solution predates Mountain Bikes. 

Are you getting my drift.  You need to get with the times.  In 2011, a new tire liner hit the bicycle market that was shown to be EVEN MORE effective than the ones that started it all back in the previous century.  RhinoDillos get their name from . . . get it!   That's because labs have proven they are better.  In fact, bike shop owners and consumers agree they are better.  Do a search and see the reviews.

So, you can continue to embarrass yourself, risk fumbling away perfectly good trail mates, and spend endless amounts of money on inner tubes, OR you can join the 21st Century and install a pair or RhinoDillos in your mountain bikes or trail bikes.  In case you also ride road or BMX, there are sizes of RhinoDillos for those, also.  Beach cruiser, city bike, comfort bike, cyclecross, 29er?  Yep. 

Where do you get a pair of RhinoDillos?  Your local bike shop.  Here is a link to a dealer locator.
http://rhinodillos.com/dealerlocator.htm

What if your favorite shop doesn't carry RhinoDillos?  Do them a big favor and let them place an order for you with their distributor.  Then suggest that all of their customers may not be as nice as you, and might go buy there RhinoDillos at another shop.


Thursday, July 11, 2013

Getting a Bicycle Flat at 138 MPH

Check out this mountain bike speed record 


In a continuation of our effort to bring you the most incredible bike videos on the web, we offer you an example where you will see several mountain bike speed records being set. If you are not interested in seeing a gnarly crash, don't watch this video.


Ok. We're not saying that a flat tire caused the big crash. But it could have been. That is probably exactly what it would have looked like.  If you want to stop flats in your tires, check us out at http://RhinoDillos.com

Tuesday, July 9, 2013

This Downhill Mountain Bike Race Would be a Bad Place to Get A Flat

Mountain Bike Race Course Goes Through a Couple of Family Homes

We are searching through hundreds of online videos to bring you the very best in amazing bicycle related vids.  Here is a race course that goes through village streets, sidewalks, down alleys and jumping stairs.  Getting a flat tire on this ride would be unhelpful in the extreme.


In case you're planning to ride your bike faster than 15 mph or if you merely want to stop flats from messing up any great day on a bike, consider RhinoDillos tire liners.  Proven to be the toughest solution for bicycle flats.

Sunday, June 30, 2013

Bicycle Tools to Carry with You on Every Ride


Be Prepared to Patch or Replace Punctured Inner Tubes, Tighten a Loose Accessory, or Make Minor Repairs During You Bike Ride


Somewhere between the stripped down simplicity of the Fixie fanatics and the prepared-for-the-apocalypse crowd, there is a sensible set of things that every cyclist should have with him on every outing.  Helmet, lock, water, cash, and identification are the most critical.  The tool kit is not critical, but it can certainly help keep a minor mechanical issue from ruining an otherwise perfectly fine day.

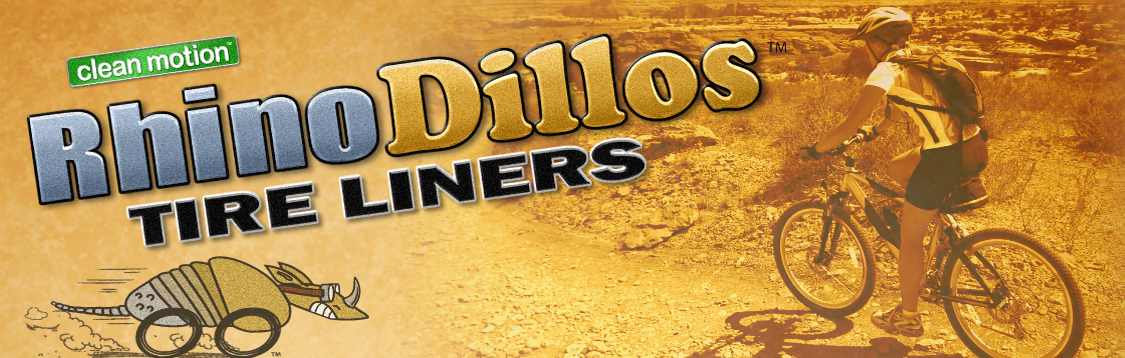
For those like me who are mechanically inept, you should still want to have the necessary tools and instruction for repairing a puncture flat.  If you live West of Topeka, and don't have tire liners like RhinoDillos tire liners to stop flats, then you most assuredly need to be thus prepared.  The various kinds of thorns littering the roads and off roads in the 11 Western States are legion.

The minimum you will need is a patch kit and inflation device.  If you have QR (quick release) wheels, then this minimalist approach can work for you.  Use the peel and stick patches.  The glue type are messy and tricky to use, though potentially better at a solid repair.  There are plenty of handy types online who suggest you can get the tire on and off without a tire lever aka tire changing too.  Unless you have already been successful in this endeavor, don't even think about it.  You do need a pair of tire levers.

For only a couple of additional ounces, you can save yourself the patching idea altogether.  Carry one or two spare inner tubes.  If you are inclined to be thrifty, carry the punctured tube home and fix it later.

Should you carry a mini pump or a CO2 Inflation device?  Both. possibly.  Use the mini pump to help with the installation, and the CO2 to fill it up.  The CO2 is nice to have if the mini pump breaks.  The mini pump is nice to have if you run out of CO2 cartridges.  Between the two?  Mini pump.

What if your bicycle doesn't have QR.  There are plenty of bikes on the road that are still using a nut on the axle.  Most of these are 15mm nuts.  Thus you will want to carry two 15mm wrenches of some kind.  Avoid the use of adjustable crescent wrenches or cheap tools of any kind.

With tire levers, patch kit, extra tube, and inflation device, you should be completely ready for any flat that doesn't also destroy your tire.  There are nice foldable bike tires on the market that can be added to the tool kit.

Beyond a flat tire, the next most likely roadside repairs would be a stiff or broken chain.  For this you will need a chain tool and a couple of spare chain links.  This is actually an easy repair, but not if you've never done it before.  Use your smart phone to watch a video on the subject as you do the repair.

Most other issues are not going to stop the fun.  But when an accessory gets loose, or your brakes aren't stopping the bike, you might want to take a few minutes to tighten things up.  There are many multi tool kits on the market that include screw drivers and hex tools galore   

The list.  A recap:
  1. Tire levers aka tire changing tool
  2. Pump or CO2 device for inflating the tire
  3. Patch kit
  4. Spare inner tube (2)
  5. Spare fold up tire
  6. 15mm wrench if non QR wheel
  7. Chain tool
  8. Several chain links
  9. Multi - tool
  10. Seat bag to hold these items
Last note.  Quality tools don't cost much more, but they work so much better. 


Enhanced by Zemanta

Tuesday, June 25, 2013

How to Fix a Bicycle Flat on the Road

9 Steps to Getting A Bike Flat Tire Fixed While On a Ride

You bike just got a flat while you were out on a ride.  Now what?


Step 1 - Ask your girlfriend (wife, kids, friends) to calm down.  It will only take a little while to fix the flat and get everybody back on the road.  If they continue to complain and moan and groan, tell them to either help or give you a break.  Try to keep the entire thing from turning into a big huge scene.

Step 2 - Review your tool kit.  You don't have a tool kit?  Does someone with you have tools?  Are there others out on the road that might have bike tools.  Flag these people down and hope they are friendly.

Step 2A - Second version.  You have some tools.  Tire changing levers, (or some not too sharp object that will work).  Option:  You've seen people take tires off with their bare hands.  Surely that will work.   You have a patch kit or a spare tube or both.  You have a pump or a CO2 Cartridge.  Your bike has quick release or you have a tool to remove/loosen the nut holding the wheel on the frame.

Step 3 - With a set of tools now at your disposal, you can begin to work.  Remind all who are watching what a pro you are at changing bike tires, regardless of your experience.  Begin by removing the wheel.  Well, not exactly.  You first need to relax the brakes so that you can slide the wheel out from beneath the brakes.  The ways to do this are as numerous depending on the type of brake.  Sometimes you can force the wheel out without relaxing the calipers.

Pictures thanks to http://www.bikewhenever.com/flat_tube_removal.html


Step 4 - After removing the wheel, you can now remove the tire from the wheel.  Slide your tire lever under under the bead of the tire. . . The bead is that part at the very end of the casing . . . the casing. . . never mind.  Look over at the picture.  Pull the bead up and over the bead of the rim, and lock the tire lever on one of your spokes.  Now use the second lever (if you have one) to pull the bead of the tire out of the rim a few inches away from where you did the first one.  Now you should be able to slide the lever around under the bead and the tire is off.  If you think taking the tire off was hard, wait until you want to put it back on.

Step 5 - Clean up the blood on your knuckles as best you can and see if anyone has some anti bacterial soap, Neosporin, band-aids or other helpful first aid products.  The pain in your eye will subside, usually, in few minutes.  Flying tire changing levers are just part of the fun.

Step 6 - Ask your wife (girlfriend, kids, friends) to stop crying, whining, laughing, etc.

Step 7 - Now remove the inner tube from the wheel.  You may need to remove a small nut that is keeping the valve in place.  Inflate the inner tube if your intention is to patch it. (With any luck your pump will have the proper head for the valve)  This is so you can find the hole in the tube.  You may need to substantially over inflate the tube to help with this.  Now hold the tube up to your ear and rotate, hoping to hear the leak or feel the escaping air against your ear or face.  Warning: Be extra cautious around your prank-prone friends. Concentrating on finding a small hole in a tube is a great time to catch you off guard!

You can submerge the tube in water and rotate, looking for bubbles.  However, this is not likely on the road.  When you think you have the leak, check around the same spot for possible additional leaks.  Sometimes the thorn or other road debris will have punctured you more than once.

How large is the hole.  If more than 1/16" in diameter, you may not be able to patch it.  Aren't you glad your have the spare tube?  If possible, patch the tube following the instructions on the packaging for the patch kit.  After patching, blow the tube up again with your pump and see if the patch worked.  In my experience the odds of that are somewhere around 50-50.

Step 8 - Run your hand up under the tire casing and all around the full circumference to see if you feel any sharp objects.  You can also do a visual exam of the inside and outside.  Pay special attention to the location where the flat occurred by lining up the valve with the valve hole and checking where on the tire the leak would line up.

Step 9 - Puff up your chest and announce to all who still care that the tube held air, and now all you have to do is replace all this, and we can be on our way.

Step 10 - Find the nuts that go on the wheel and the valve stem.  If any of your fellow riders are still hanging around, ask them to help in the hunt. 

Step 11 - Place half of the tire back on the wheel.  Have the part of the tire that is not on the wheel facing you.  Now stuff the inner tube up inside the tire.  Pump up the tube to help hold it in place.  Now replace the nut that you have hopefully found back on the valve stem.

Step 12 - Using the heal of your hands, push the other bead of the tire back up onto the rim.  Do this all the way around.  Sometimes you can use both hands and have them rotating in opposite directions.  Eventually you will get to a point where you are unable to force the bead onto the rim.

Some who are practiced and strong can actually  finish the replacement of the tire with their bare hands.  You will likely need to get out the trusty tire tool at this point.  Using the tool as a lever, place the end of the tool on the bead of the rim under the tire, and lever the tire up onto the rim.  There are two things you want to watch out for at this time.
  1. Try to scrape different knuckles this time.  It hurts a lot to rescrape earlier owies.  
  2. Do not get any part of the tube in between the tire tool and the rim.  This is much easier than it might seem.  Pinching the tube will mean starting over, and your adoring fans will leave you.
Once the tire is back all the way onto the rim, check to make sure that the tire is evenly seated.  Seated is geekspeak for - the tire is even on both sides and all around the rim.  You might add a bit of inflation to help with this process.

Step 13 -  Place the wheel back on the bike before fully inflating.  Grease from the chain and the derailleur will undoubtedly get all over you and your clothes, but most of it will come out.  Make sure the wheel is spinning evenly and not off kilter.  Once you have tightened the QR or the nuts, reposition the brakes and reactivate them.

Step 14 -  Inflate the tire to the recommended amount and pray:
  • That there were no other holes that are unpatched
  • That there was no other road debris or thorns still in place
  • That you didn't pinch the tube when you levered the tire in place
  • That you have properly replaced all parts
Step 15 - Step back to admire your work.  Remount the bike and pedal around.  Get off the bike and readjust the brakes so they stop rubbing on the rim.  Test the brakes to make sure they stop the vehicle as needed. 

Step 16 - Use your cell phone to find out where the other members of your party are at this time.

Step 17 - Immediately upon returning home from your ride, head over to the local bike shop.  Do not regale the clerk with your story.  He has heard it many, many times before.  Buy any and all tools that you didn't have when you needed them.  Buy a spare tube.  Then buy a pair of tire liners.  Not just any tire liners, but RhinoDillos Tire liners.  You see - having all the tools and the spare tube and stuff will not solve the problem.  RhinoDillos will.  And you will get the benefit of being in the crowd that does the complaining, laughing, and leaving. 


Monday, June 17, 2013

Video - A Really Bad Time to Get a BIke Flat - While Being Chased by A Falcon

Bird's Eye View of Man vs Falcon Competition - See it to Believe it!


We are hoping that this guy has RhinoDillos Tire Liners in his bike tires.  It's one thing to handle all those turns and jumps when all you're thinking about is your technique.  But somehow the stakes are higher when a Falcon is in hot pursuit.  A Flat Tire in the middle of this deal could be a completely different kind of stunt.